Homemade vs. Store-Bought: Unveiling the Best Vegan Chocolate Almond Butter
The allure of a rich, creamy, and subtly sweet spread is undeniable. For many, that craving often leads straight to chocolate almond butter. As a delightful fusion of nutty goodness and decadent cocoa, it's become a pantry staple and a beloved treat. But for the health-conscious, the budget-savvy, and especially those embracing a plant-based lifestyle, a crucial question arises: is it better to buy a jar from the store or whip up your own homemade chocolate almond butter vegan style?
While grocery store shelves boast an increasing variety of vegan options, the homemade route offers unparalleled benefits, from ingredient control to unmatched freshness. Let's delve into the delicious debate and discover why making your own just might become your new favorite kitchen ritual.
The Irresistible Appeal of Homemade Chocolate Almond Butter (Vegan)
There's a unique satisfaction that comes with creating something delicious from scratch, and vegan chocolate almond butter is no exception. Beyond the sheer joy of DIY, several compelling reasons make the homemade version a standout winner:
- Uncompromised Ingredient Control: This is arguably the biggest advantage. When you make your own, you dictate every single ingredient. Commercial varieties often contain added sugars, unhealthy oils (like palm or hydrogenated oils), emulsifiers, and preservatives to extend shelf life and cut costs. With homemade, you choose the quality of your almonds, the richness of your cocoa powder, and your preferred natural sweetener. This means you can avoid refined sugars, unwanted additives, and potential allergens, tailoring it perfectly to your dietary needs and preferences.
- Significant Cost Savings: Walk down the nut butter aisle, and you'll quickly notice that specialty spreads, especially vegan and organic options, come with a hefty price tag—often $10, $15, or even more for a single jar. The core ingredients for homemade chocolate almond butter, particularly if you start with pre-made almond butter, are far more economical. Even if you begin with whole almonds and process them yourself, the bulk cost often beats the premium pricing of store-bought versions. This makes enjoying your favorite spread a much more sustainable habit.
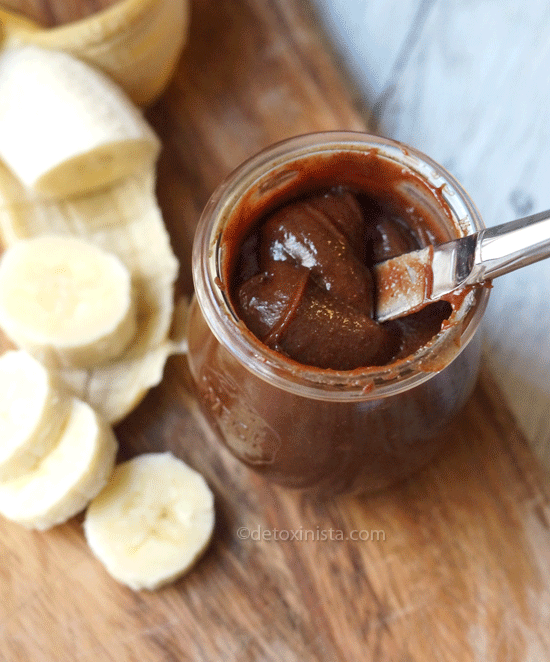
- Superior Freshness and Flavor: There's no substitute for fresh. Store-bought spreads can sit on shelves for months, impacting their flavor profile. Homemade chocolate almond butter, made just days or even hours before consumption, bursts with vibrant, authentic flavors. The aroma of freshly ground almonds combined with rich cocoa is simply incomparable, offering a sensory experience that pre-packaged jars can rarely match.
- Empowering Customization: Fancy a hint of sea salt? A touch of vanilla? Perhaps a spicy kick of cayenne? When you make it yourself, the flavor possibilities are endless. You're not limited to what a manufacturer decides to produce. This adaptability allows you to experiment and perfect your ideal spread, ensuring every spoonful is exactly how you like it.
- Environmental Consideration: Making your own spreads can contribute to reducing packaging waste. While you'll still buy ingredients, you'll be refilling your own reusable jars, cutting down on the continuous cycle of single-use plastic or glass containers from store purchases.
Crafting Your Own: A Simple Guide to Homemade Chocolate Almond Butter at Home
The beauty of homemade vegan chocolate almond butter lies in its simplicity. You don't need extensive culinary skills or a gourmet kitchen. The process is straightforward, allowing for real-time adjustments to achieve your desired taste and consistency.
Basic Ingredients for Your Chocolatey Creation:
At its core, you'll need just a few key components:
- Almond Butter Base: Start with 1/2 cup of plain almond butter. For ultimate freshness and control, you can make your own almond butter first by processing roasted almonds in a heavy-duty food processor for 10-15 minutes until smooth and creamy. However, using good quality store-bought almond butter as your base is perfectly acceptable and significantly cuts down prep time. This recipe is also highly adaptable to other nut or seed butters like cashew, sunflower seed, or peanut butter.
- Natural Sweetener: 3 tablespoons of pure maple syrup is a fantastic vegan option, offering a lovely caramel note. Other choices include agave nectar, coconut nectar, or even a few drops of liquid stevia for a sugar-free alternative. Remember to adjust to your sweetness preference.
- Cocoa Powder: 2.5 tablespoons of unsweetened cocoa powder (or raw cacao powder for a more nutrient-dense option) provides that essential chocolatey depth. You can add more or less depending on how intense you want the chocolate flavor.
- Liquid for Consistency: 2 tablespoons of water (or almond milk for extra creaminess) will help achieve that perfect spreadable texture. Add it gradually, as needed.
Step-by-Step Instructions:
- Combine the Dry & Wet: In a medium-sized bowl, scoop in your almond butter, maple syrup, and cocoa powder.
- Mix and Assess: Begin stirring the mixture. It will likely be very thick and difficult to combine at first, resembling a crumbly paste. Don't worry, this is normal!
- Adjust for Spreadability: Now, add the water (or almond milk) one tablespoon at a time. Mix thoroughly after each addition. You'll notice the mixture gradually transforming, becoming smoother and more spreadable. Your goal is a consistency that's easy to dollop and spread, not too stiff and not too runny.
- Taste and Customize: This is the most crucial step for perfection! Taste a small spoonful. Does it need more chocolate? Add a little more cocoa powder. Want it sweeter? Stir in another dash of maple syrup. Too thick? Add another splash of water. Continue adjusting and tasting until it's exactly how you like it. This "taste as you go" method ensures you'll always hit your personal flavor sweet spot.
For an even deeper dive into perfecting your homemade creation, consider exploring tips on how to perfect your vegan chocolate almond butter at home.
The Store-Bought Alternative: Convenience vs. Compromise
While the homemade route clearly offers numerous advantages, there's no denying the convenience factor of store-bought chocolate almond butter. If you're pressed for time or simply prefer not to venture into the kitchen, a pre-made jar can be a lifesaver.
Pros of Store-Bought:
- Instant Gratification: Grab a jar, open it, and enjoy. No prep time required.
- Longer Shelf Life: Thanks to preservatives and stabilizers (like hydrogenated oils or palm oil, which are often non-vegan or ethically questionable), store-bought versions typically last much longer in the pantry or fridge.
- Consistent Texture: Manufacturers aim for a uniform product, so you can generally expect the same texture every time.
Cons of Store-Bought:
- Higher Cost: As mentioned, these specialty spreads often come at a premium.
- Hidden Ingredients: Many brands include refined sugars, unhealthy fats, and emulsifiers that you might prefer to avoid. Always read the label carefully to ensure it aligns with your vegan principles and health goals.
- Less Fresh Flavor: The intense, fresh flavor of homemade is hard to replicate in a mass-produced product.
- Limited Customization: You're stuck with the manufacturer's recipe.
When choosing a store-bought option, prioritize brands with minimal, recognizable ingredients. Look for labels that list only almonds, cocoa, and a natural sweetener, ideally without added oils or excessive sugar.
Maximizing Freshness and Enjoyment of Your Homemade Creation
The only real 'downside' to homemade vegan chocolate almond butter is its shorter shelf life compared to its preservative-laden store-bought counterparts. Because you're adding water and not using artificial stabilizers, it won't last indefinitely.
- Storage: Store your freshly made chocolate almond butter in an airtight container in the refrigerator. This is crucial for maintaining freshness and preventing spoilage.
- Shelf Life: Enjoy your delicious spread within 1-2 weeks. Due to the added moisture, it can spoil quicker than plain almond butter. Don't make an overly large batch unless you plan to devour it swiftly!
- Serving Suggestions: The possibilities are endless!
- Spread it generously on toast, bagels, or rice cakes.
- Use it as a dip for fresh fruit slices (apples, bananas, strawberries are divine).
- Swirl it into oatmeal or yogurt for a decadent breakfast.
- Drizzle it over pancakes or waffles.
- Blend it into smoothies for a creamy, chocolatey boost.
- Use it as a filling for vegan crepes or pastries.
- Of course, the classic: enjoy it straight off the spoon when a craving strikes!
Conclusion
While store-bought vegan chocolate almond butter offers convenience, the benefits of crafting your own homemade chocolate almond butter vegan style are simply too compelling to ignore. From total control over wholesome ingredients and significant cost savings to the superior fresh flavor and the immense satisfaction of creation, going homemade elevates this beloved spread to a whole new level. It's a simple, rewarding process that results in a nutritious, decadent, and utterly customizable treat. So, skip the expensive jars and the mystery ingredients, and embrace the joy of making your own. Your taste buds, your wallet, and your health will thank you!
